According to Baymard Institute, a better checkout can increase your conversion rate by 35.26%. Magento 2 shipping table rates can add multiple shipping methods to your online store’s checkout process. Thus, you can increase conversion rates by offering various suitable shipping methods. In addition, when a customer checks out, the estimated shipping fee will appear in the quote section of the shopping cart. As a result, your Magento eCommerce creates a more convenient shopping experience for your customers, reduces the support team’s workload, and drives sales. Read on to know how to set up Magento 2 table rates!
Things you need before configuring Magento 2 shipping table rates

Magento 2 shipping table rates allow you to calculate different shipping rates based on table rate factors that refer to a data table like Free Shipping and Fixed Rate Shipping methods. Shipping fees may vary depending on different conditions, including:
- Price compared to Destination
- Weight compared to Destination
- Number of Items compared to Destination
All of the above factors are listed in the table scale file. In short, the only thing you need to prepare is to define shipping rates for specific scenarios, from international shipping to click and collect, to populate the Magento 2 table rates.
Also, you may wonder “How long does table rate shipping take to set up?” – The table rate shipping configuration may take you no more than 2 minutes. Thus, it’s time to learn how to set up Magento 2 table rates.
Step by step guide on how to set up Magento 2 table rates
Step 1: Complete the default settings for table rates
To begin, you need to configure default settings for Magento 2 shipping table rates:
- On the admin panel, select Store > Settings > Configuration
- On the left panel, under Sales, select Delivery Methods
Next, enable the shipping method:
- Set Enabled to Yes
- The default title is Best Way
- Fill in the Title that you want to display on the table price section at checkout

You can select a Condition to calculate your Magento 2 table rates, including:
- Number of items compared to Destination
- Price compared to Destination
- Weight compared to Destination

If the order includes virtual products for pricing, select Yes in the Include Virtual Products in the Price Calculation. Since virtual products like services are unweighted, they can’t change the result of a calculation based on the Weight Condition v. Destination. However, virtual products may change the calculations based on Price vs. Destination or Quantity of Item vs. Destination condition.

Some items require human resources for order fulfillment, so that you may request an additional handling fee from your customers. Let’s do the following:
- Set Handling Fee: Fixed or Percent
- Enter the Handling Fee rate according to the method used to calculate the fee

You then set up Ship to Applicable Countries. You can choose either option:
- All Allowed Countries: Magento 2 shipping table rates will apply to customers from all countries in your store configuration.
- Specific countries: Only selected specific countries can use this delivery method.

Next, you set the Sort Order on the shipping method on the checkout page.
Enter a number to define the Shipping Table Price’s sequence. For example, 0 = first, 1 = second. 2 = third.

In addition, you can change the Displayed Error Message. This text box already has a default message. However, you can enter another message that you want to display when the customer’s delivery method is unavailable.
Save the configuration to finish Step 1.
Step 2: Prepare your Magento 2 table rates data
This step may be the most time-consuming and meticulous one in how to set up Magento 2 table rates. In the upper-left corner of your admin dashboard:
- Select the Store View where the config is active. You can choose Main Website or any website where the configuration applies.
- Uncheck Use Default if you want to change any settings
- Click Export CSV for Magento 2 shipping table rates CSV download
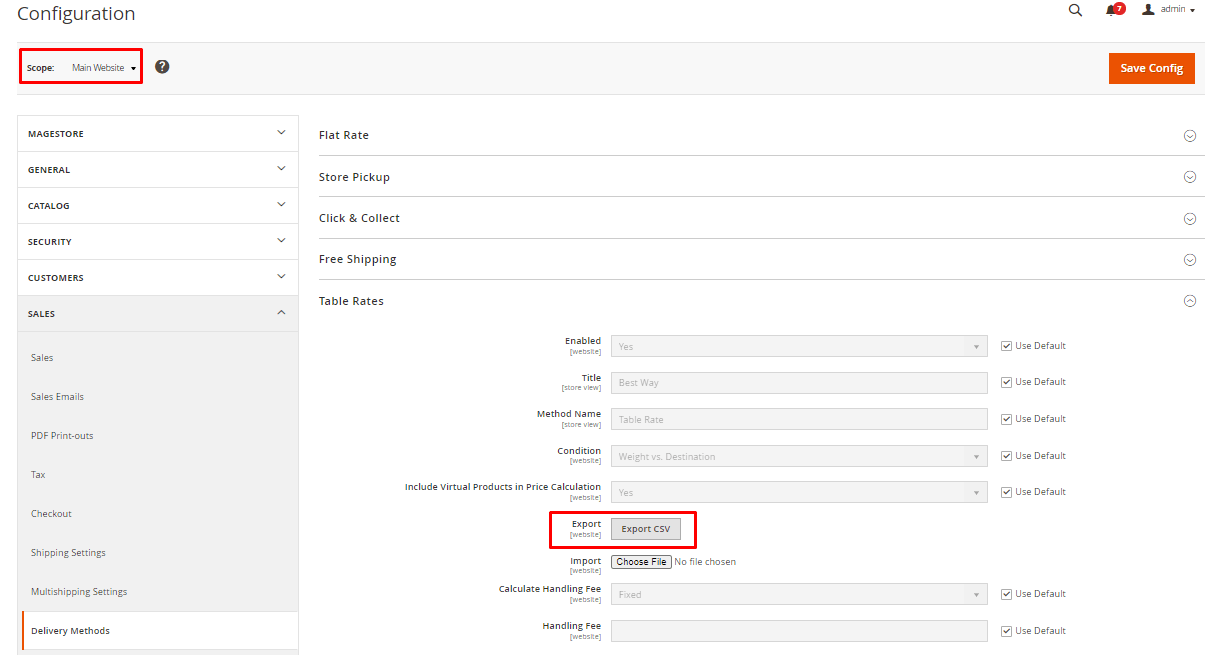
- Save the tablerates.csv file to your device
- Open the file in a spreadsheet application
Then, you need to complete the file with the appropriate values for the shipping calculation terms. Below are 3 things you need to keep in mind when filling out table fields:
- Use an asterisk (*) to represent all possible values in any category
- Enter a valid three-character code for each row for the Country column
- Sort data by Region or State so that specific positions are at the top of the list and wildcard positions are at the bottom. It handles rules with absolute values first and wildcard values after.

After completing the CSV file, Save the file on your device.
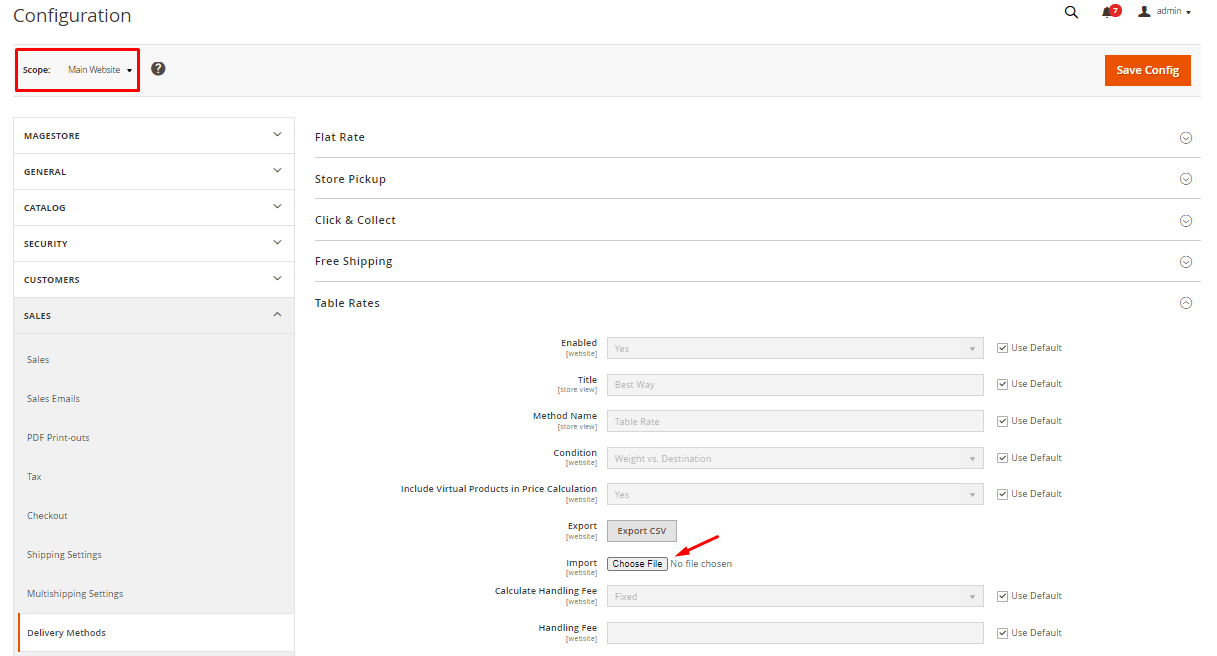
Step 3: Import table rates data
To import data, you need to return to the Table Rates section of your store configuration.
- In the upper left corner, set the Store View to the website that uses this method
- Click Choose File to import the tablerates.csv file of your Magento 2 table rates
- Upload files from your device
Save configuration to finish.
Step 4: Run a test
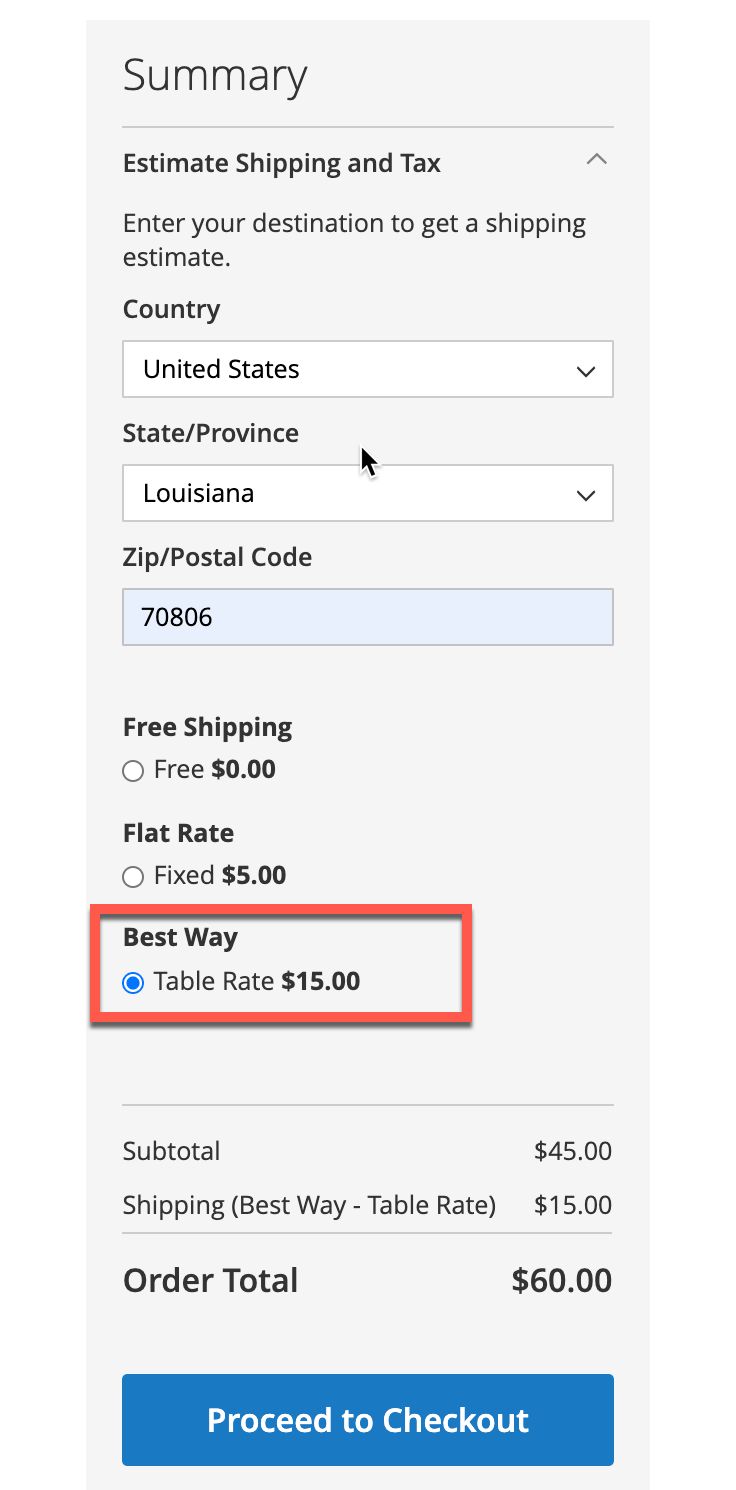
To make sure you have a successful Magento 2 shipping table rates configuration and that the calculation of shipping and handling charges is entirely correct, do a test run and check the rates. For example, you can proceed to the checkout process with different shipping addresses in the checkout.
Final thoughts
That’s all. You may need a little practice to understand it. And you’ll never wonder how to set up Magento 2 table rates again. Plus, your customers will never get confused when calculating shipping rates to compare different options.
Happy selling!