Follow the instructions below to install Magestore POS for Shopify and start your free trial. If you encounter any issues or have questions during your trial, you can contact us through the live chat section in the app.
How To Install Magestore POS For Shopify
Additionally, if you prefer a detailed walkthrough or have specific inquiries about the POS capabilities before committing, you can schedule a product demo with us.
Generate a custom app
To begin using Magestore POS for Shopify, you’ll first need to create a custom app within your Shopify admin page. This app facilitates communication between Magestore POS and your Shopify backend.
Step 1: Create a new custom app
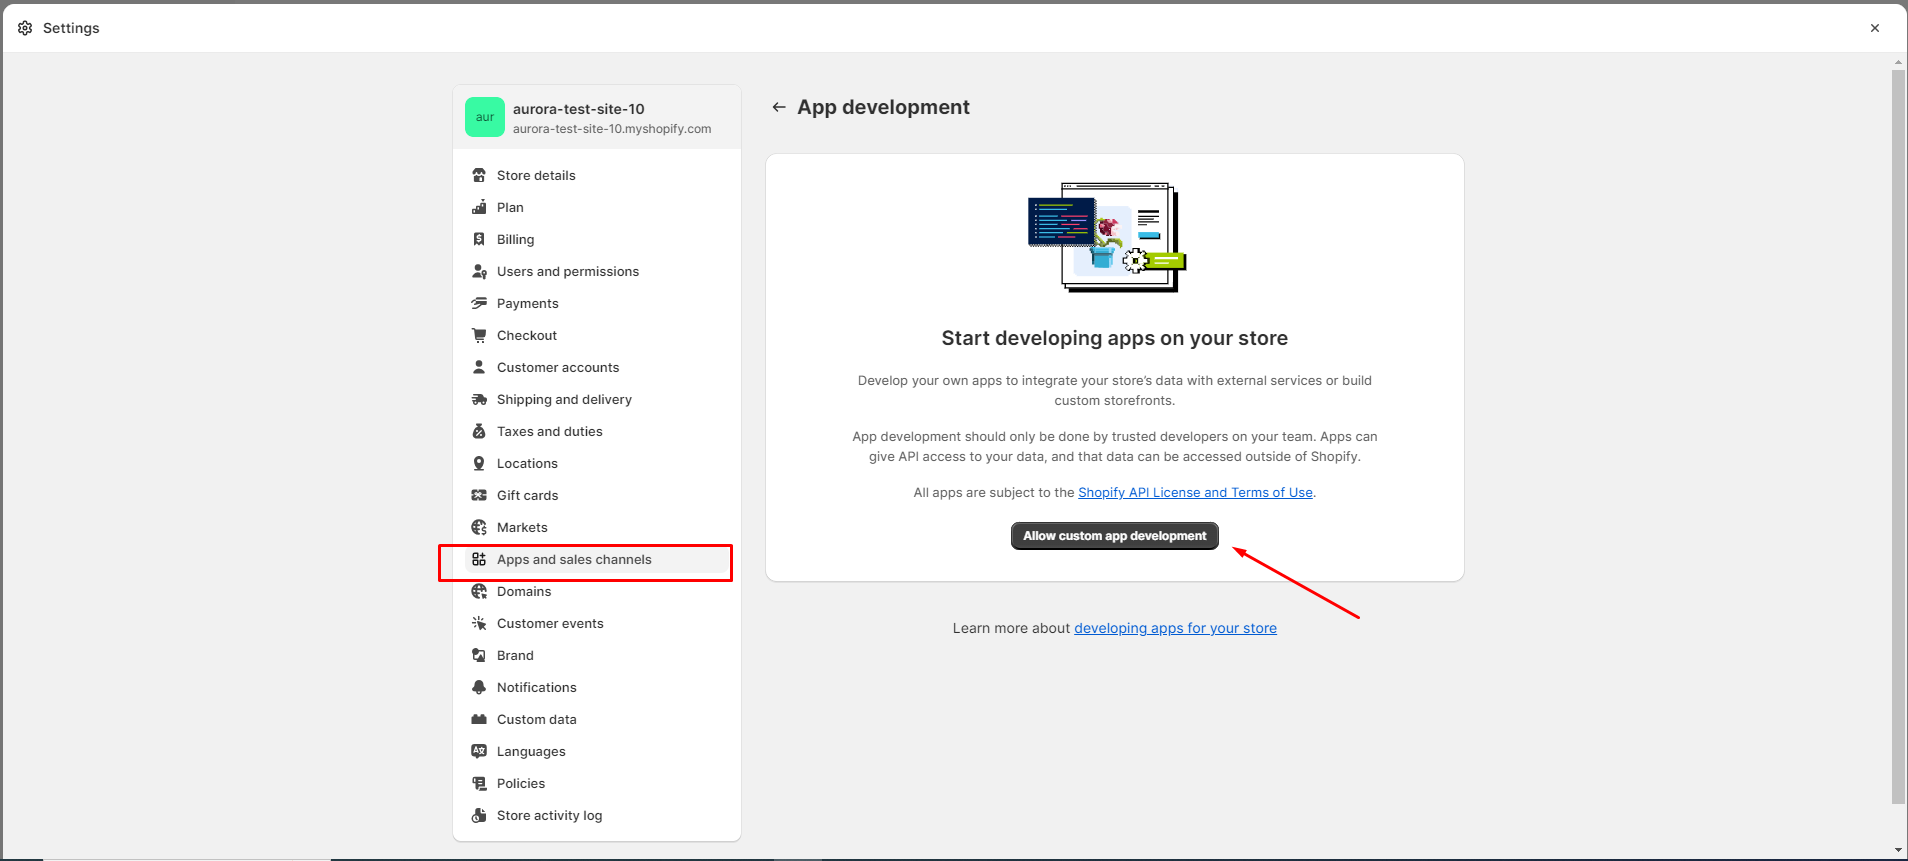
To start, navigate to the Settings page of your Shopify account.
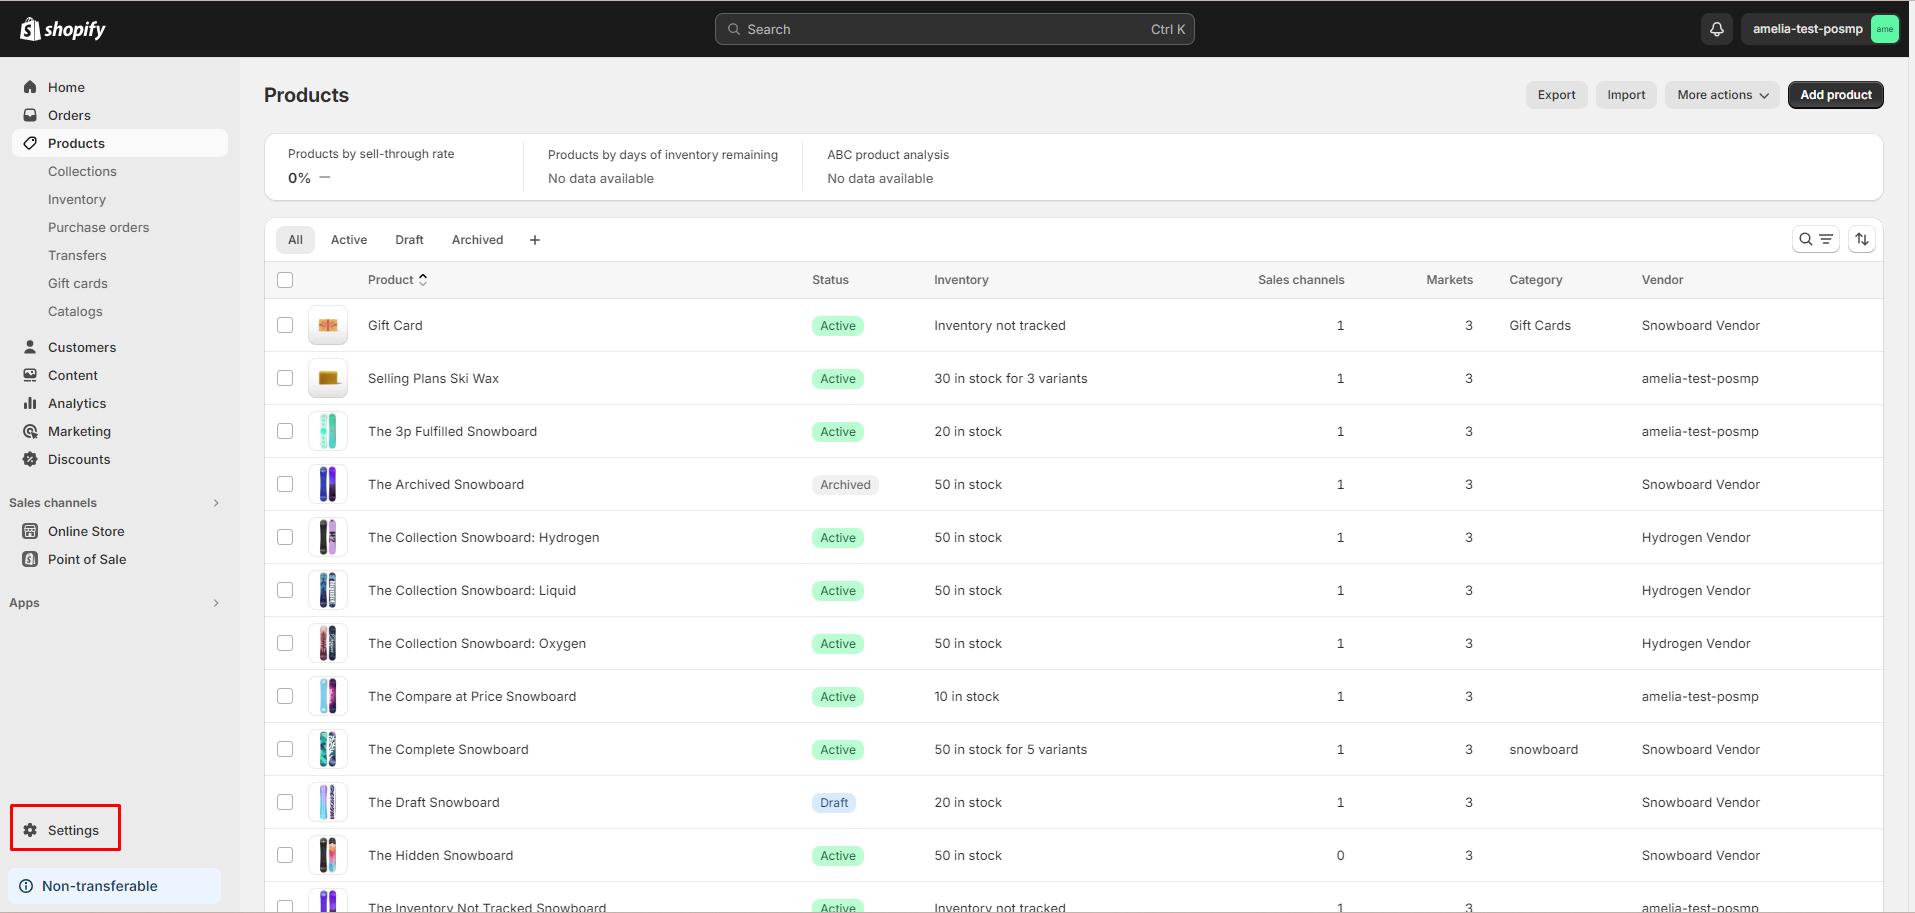
Then, select the App and sales channels tab.

Next, locate and click on the Develop apps button.

Proceed by selecting Allow custom app development.
After enabling custom app development, click on Create an app.

Enter the desired name for your app and select the app developer. Ensure the name is descriptive so it’s easy to identify later.
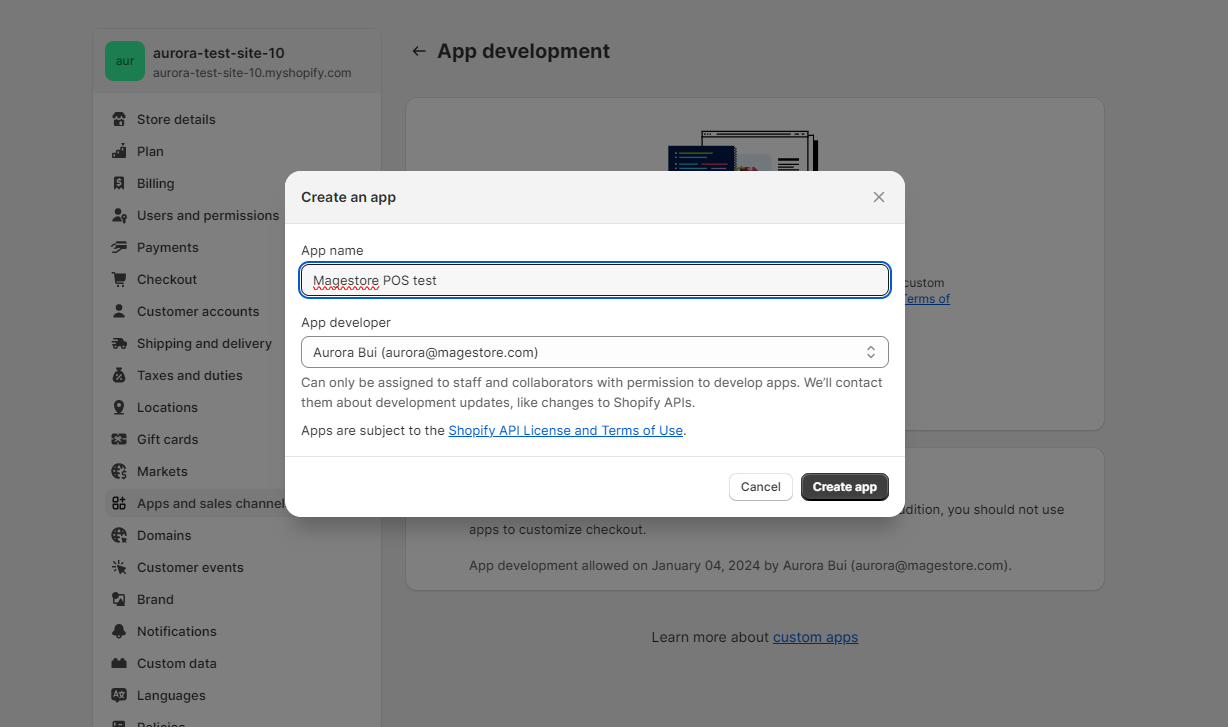
Now, click on the Create app button to proceed to step 2 of the process.
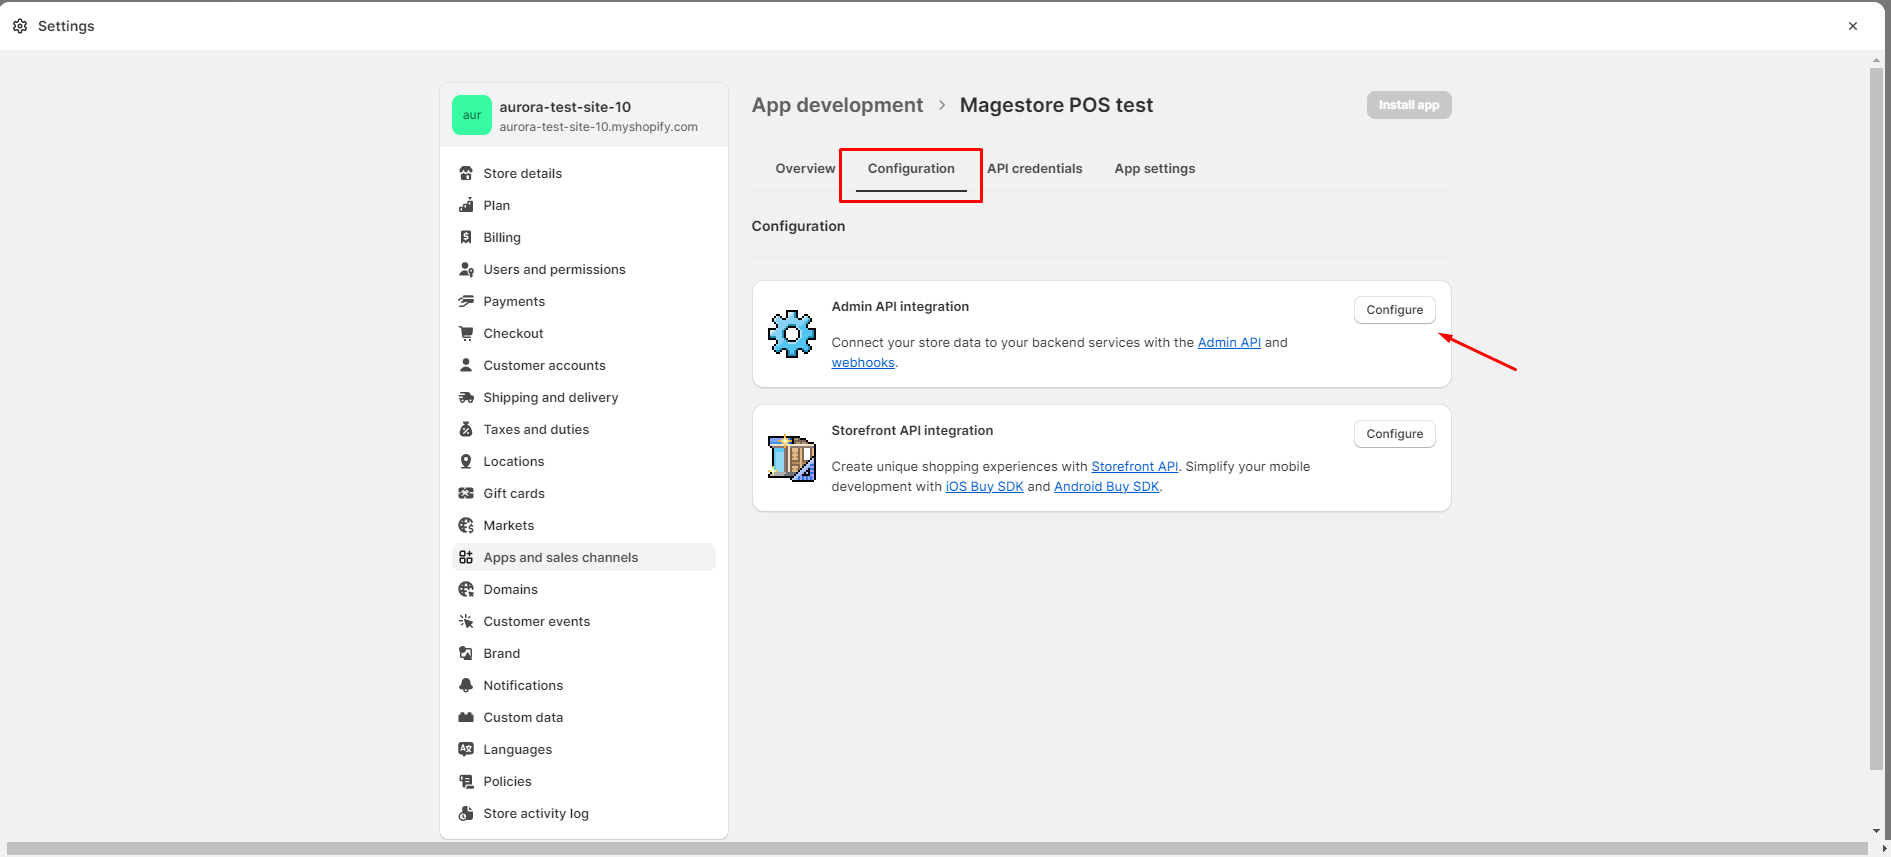
Step 2: Configure required scopes
To integrate Magestore POS, you must configure the Admin scope for the newly created custom app.
Within the Configuration tab of your custom app, find and click on the Configure button in the Admin API integration section.
Choose the 19 scopes listed below:
- write_assigned_fulfillment_orders
- read_assigned_fulfillment_orders
- write_customers
- read_customers
- read_discounts
- write_draft_orders
- read_draft_orders
- read_inventory
- read_locations
- write_merchant_managed_fulfillment_orders
- read_merchant_managed_fulfillment_orders
- write_orders
- read_orders
- read_price_rules
- read_product_listings
- write_products
- read_products
- read_locales
- write_third_party_fulfillment_orders
- read_third_party_fulfillment_orders

Once you have selected all 19 scopes, click on the “Save” button to save your configuration.
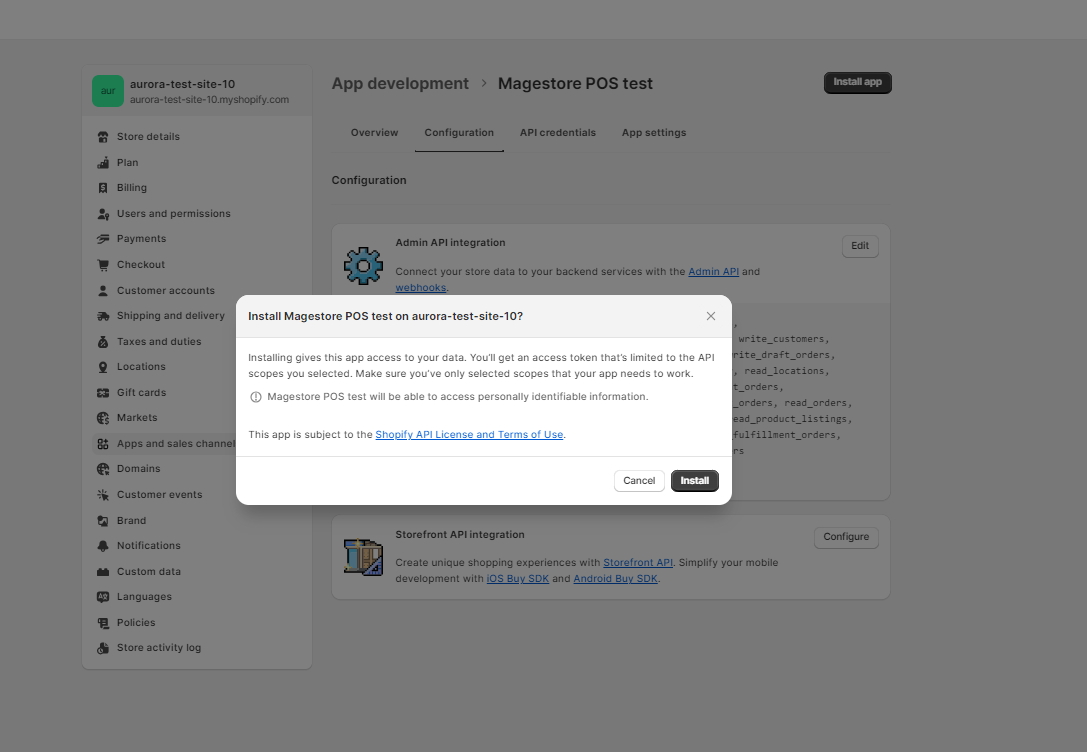
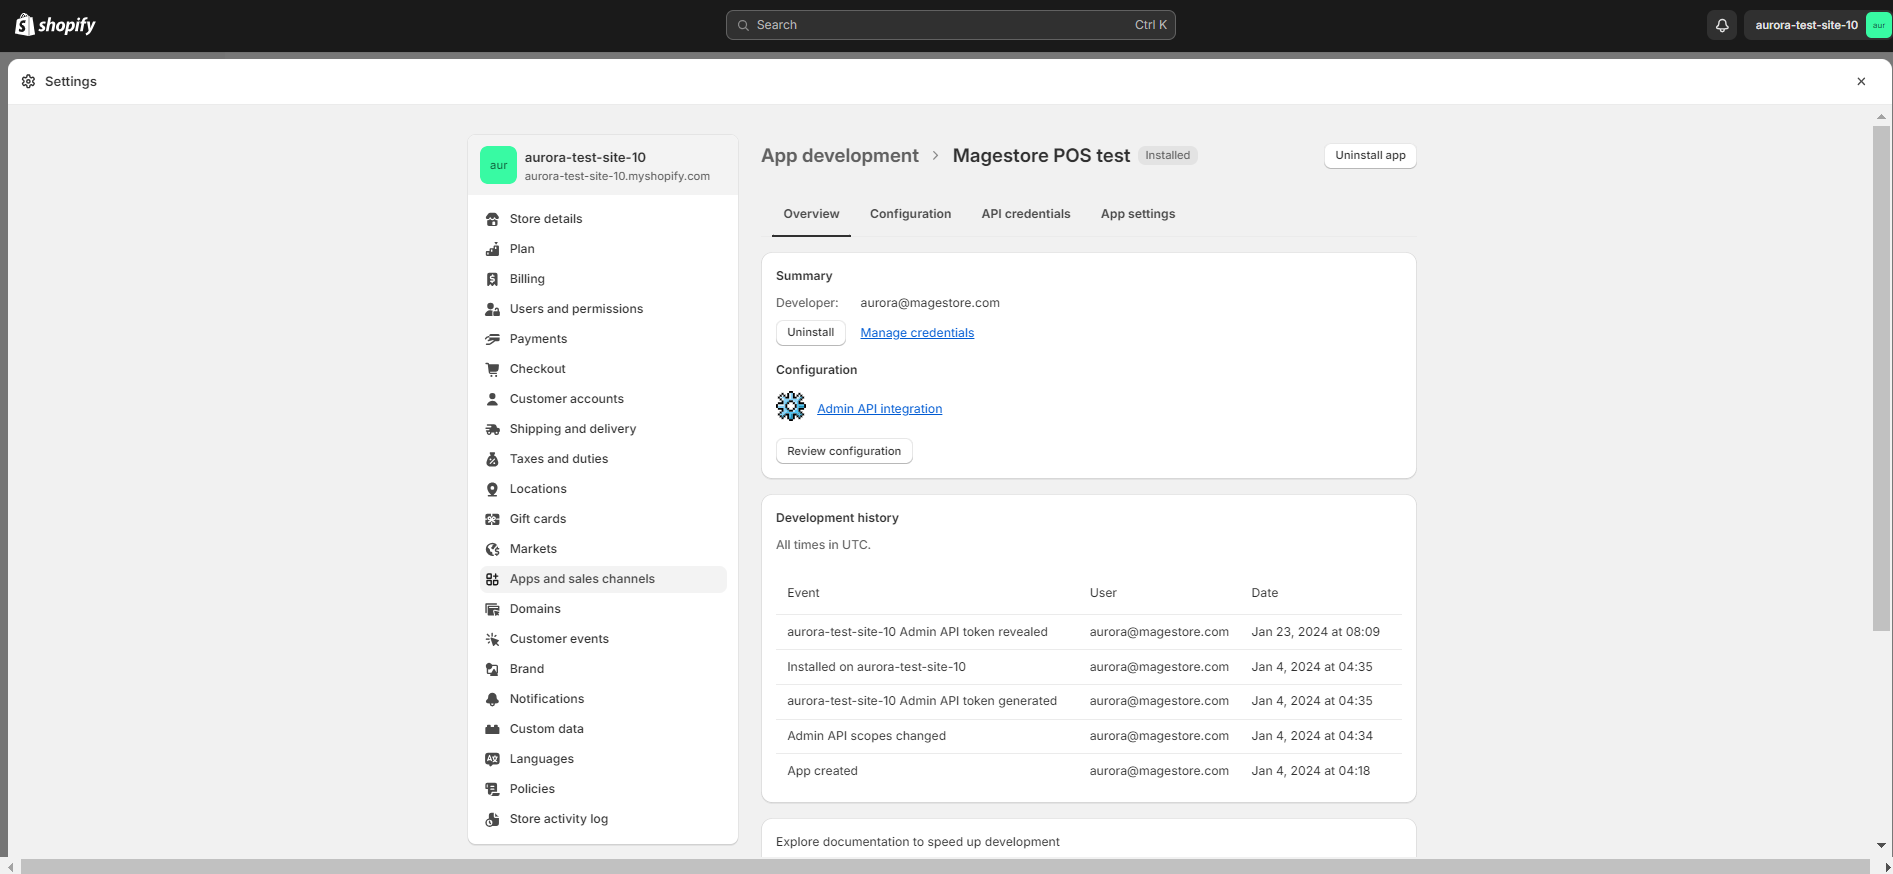
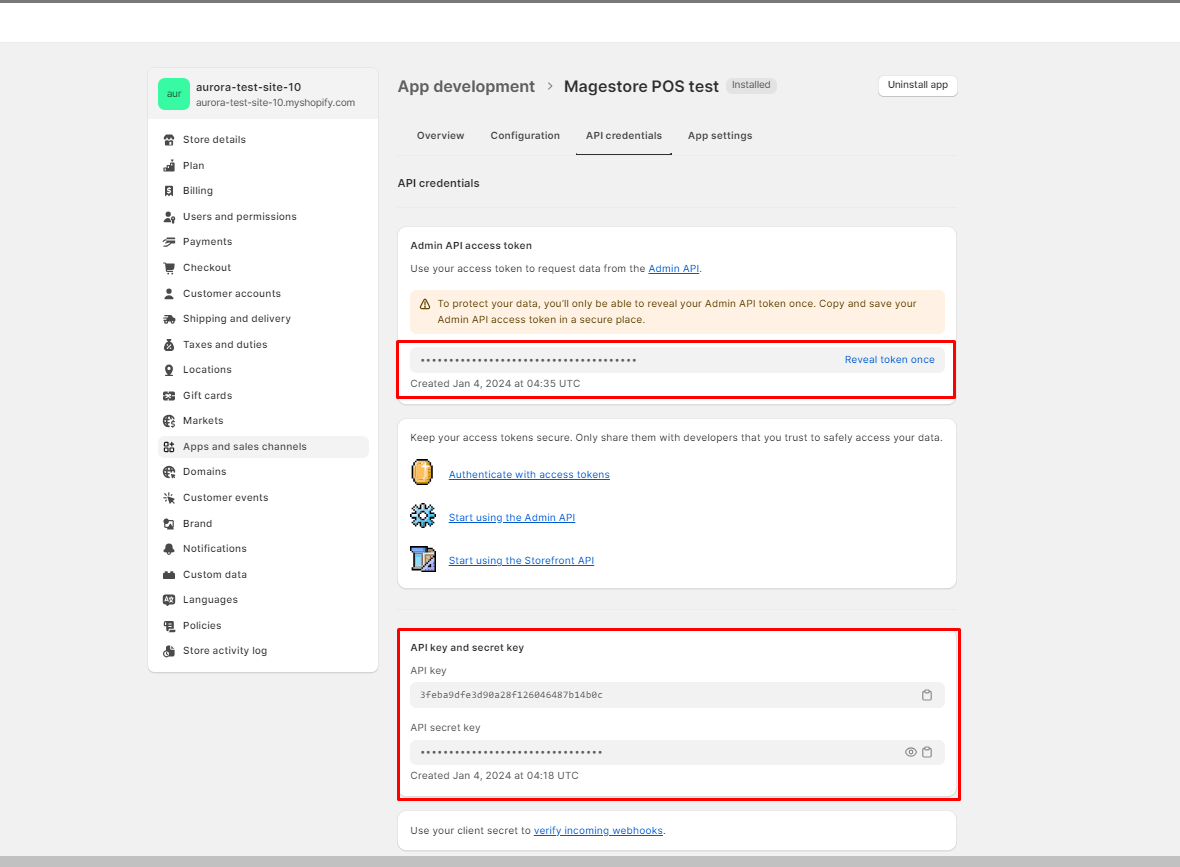
The generated custom app will be displayed as shown in the image below:
Register to Magestore POS
Step 1: Establish a connection between the custom app and Magestore POS
To activate the Magestore POS app, you’ll first need to retrieve the following 3 fields from your custom app:
- Access token
- API key
- API secret key
Remember that the Admin API access token can be only revealed once. So we suggest you save it in your browser for later usage
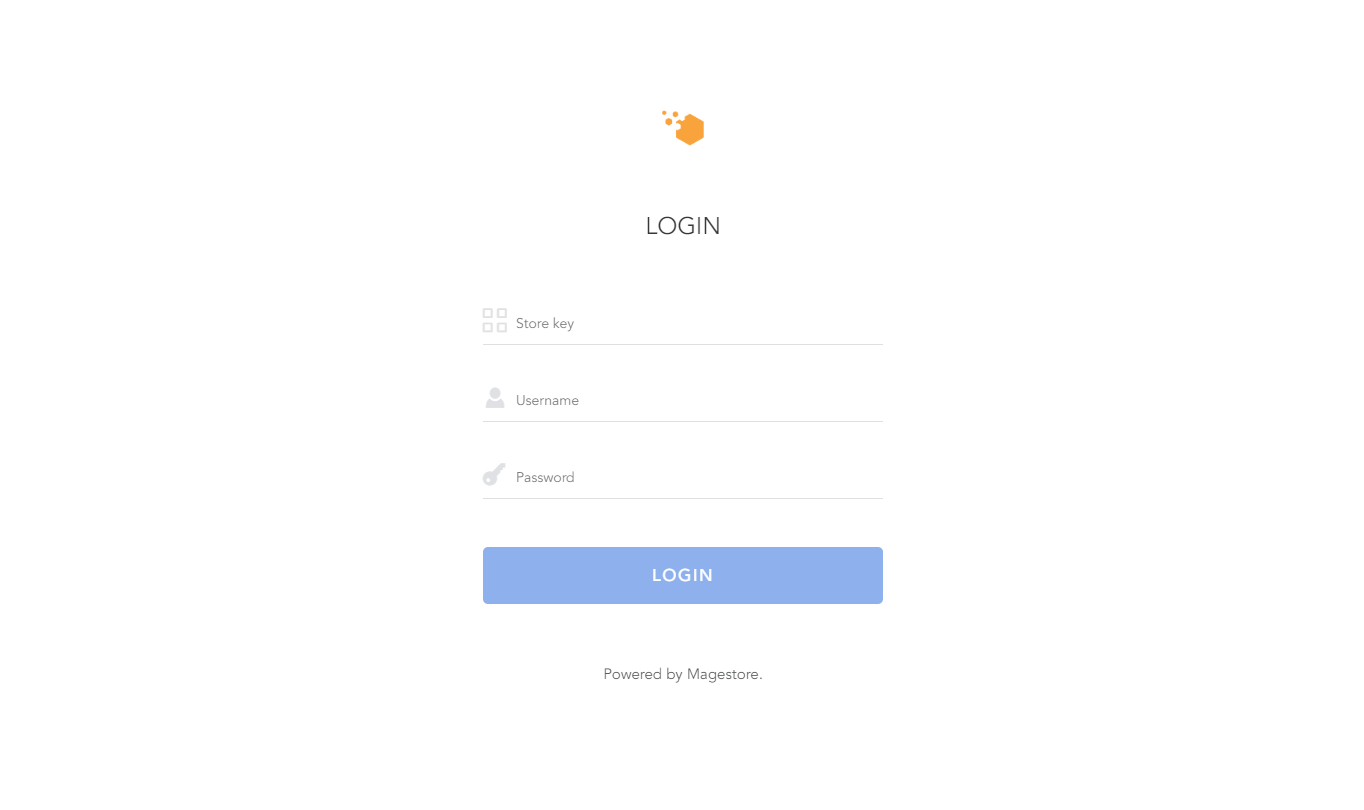
Step 2: Create an account on Magestore POS
Once you’ve obtained the API access token and API key from the custom app, navigate to the Magestore POS URL: Magestore POS Admin
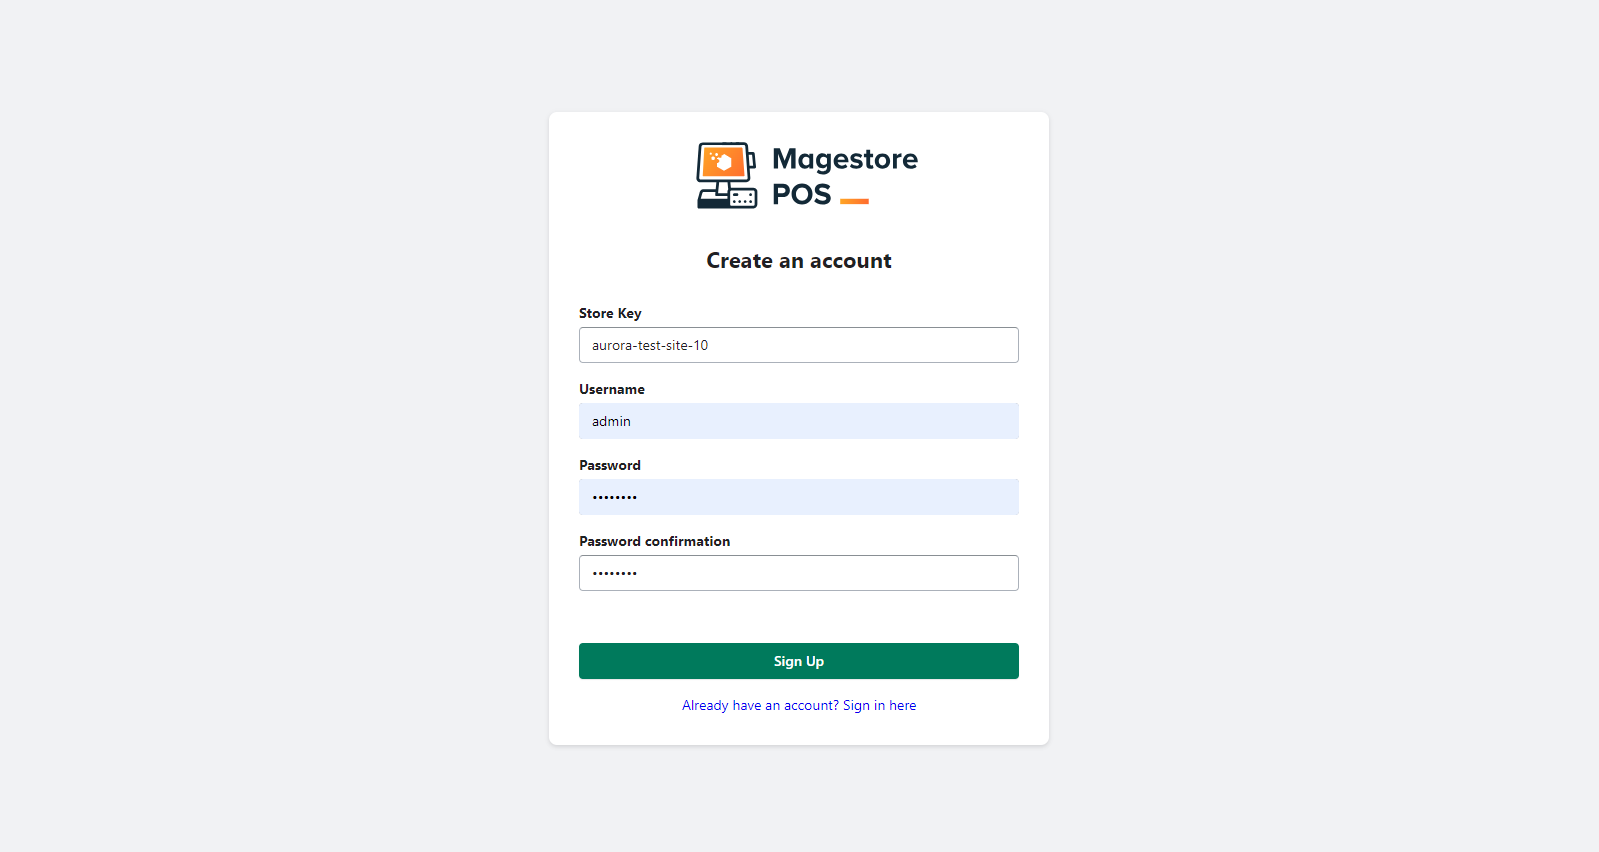
On the “Create an Account” page, complete all mandatory fields:
- Store key: This refers to the prefix of your Shopify URL, located before the “.myshopify.com” domain.

- Username: Enter an easy-to-remember username for logging in to both POS Admin and POS Checkout.
- Password and Password confirmation: Enter passwords with a minimum of 7 characters, comprising both numeric and alphabetical characters
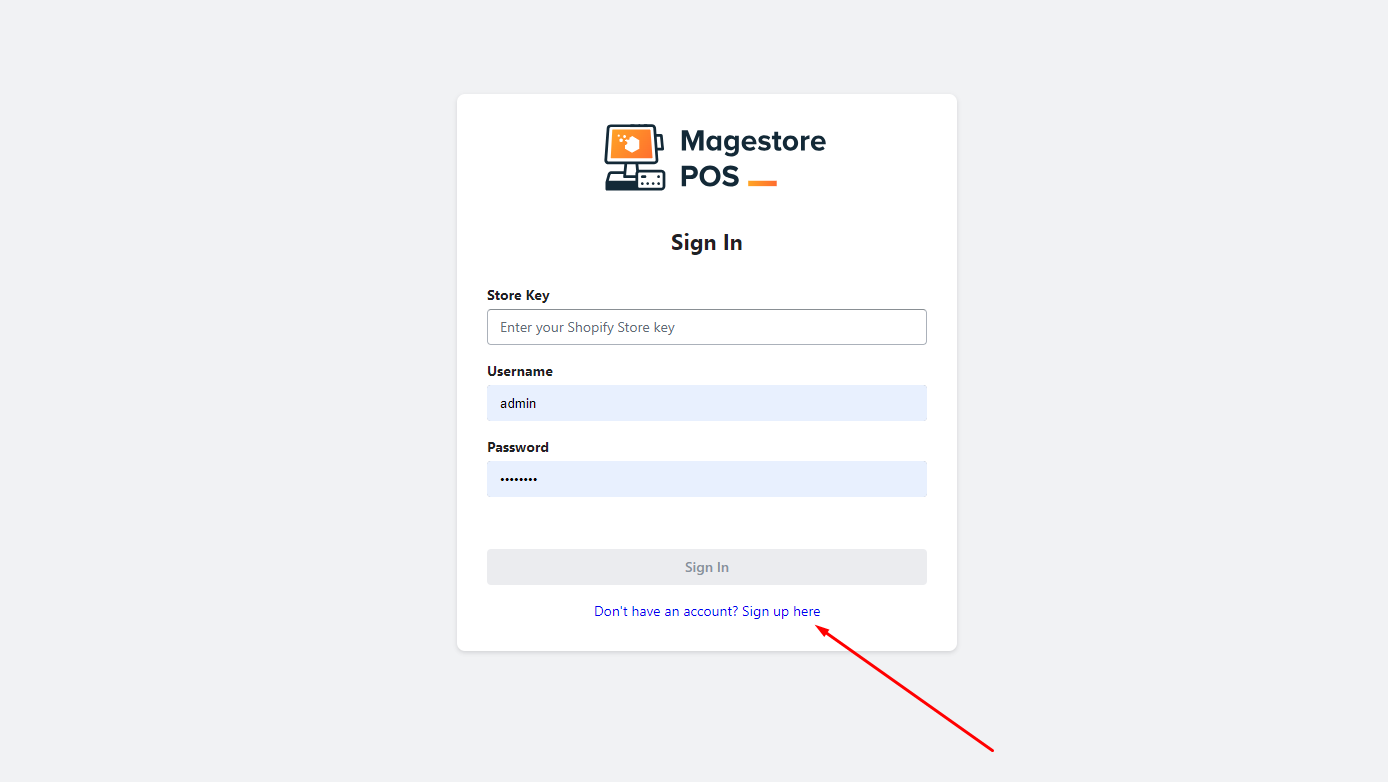
If the login screen appears first, click on the “Sign up here” button to proceed with the registration process.
After entering valid information, click the “Sign-Up” button to proceed to the Shopify Integration page.
Enter the API access token, API key, and API secret key that you saved in the previous step.
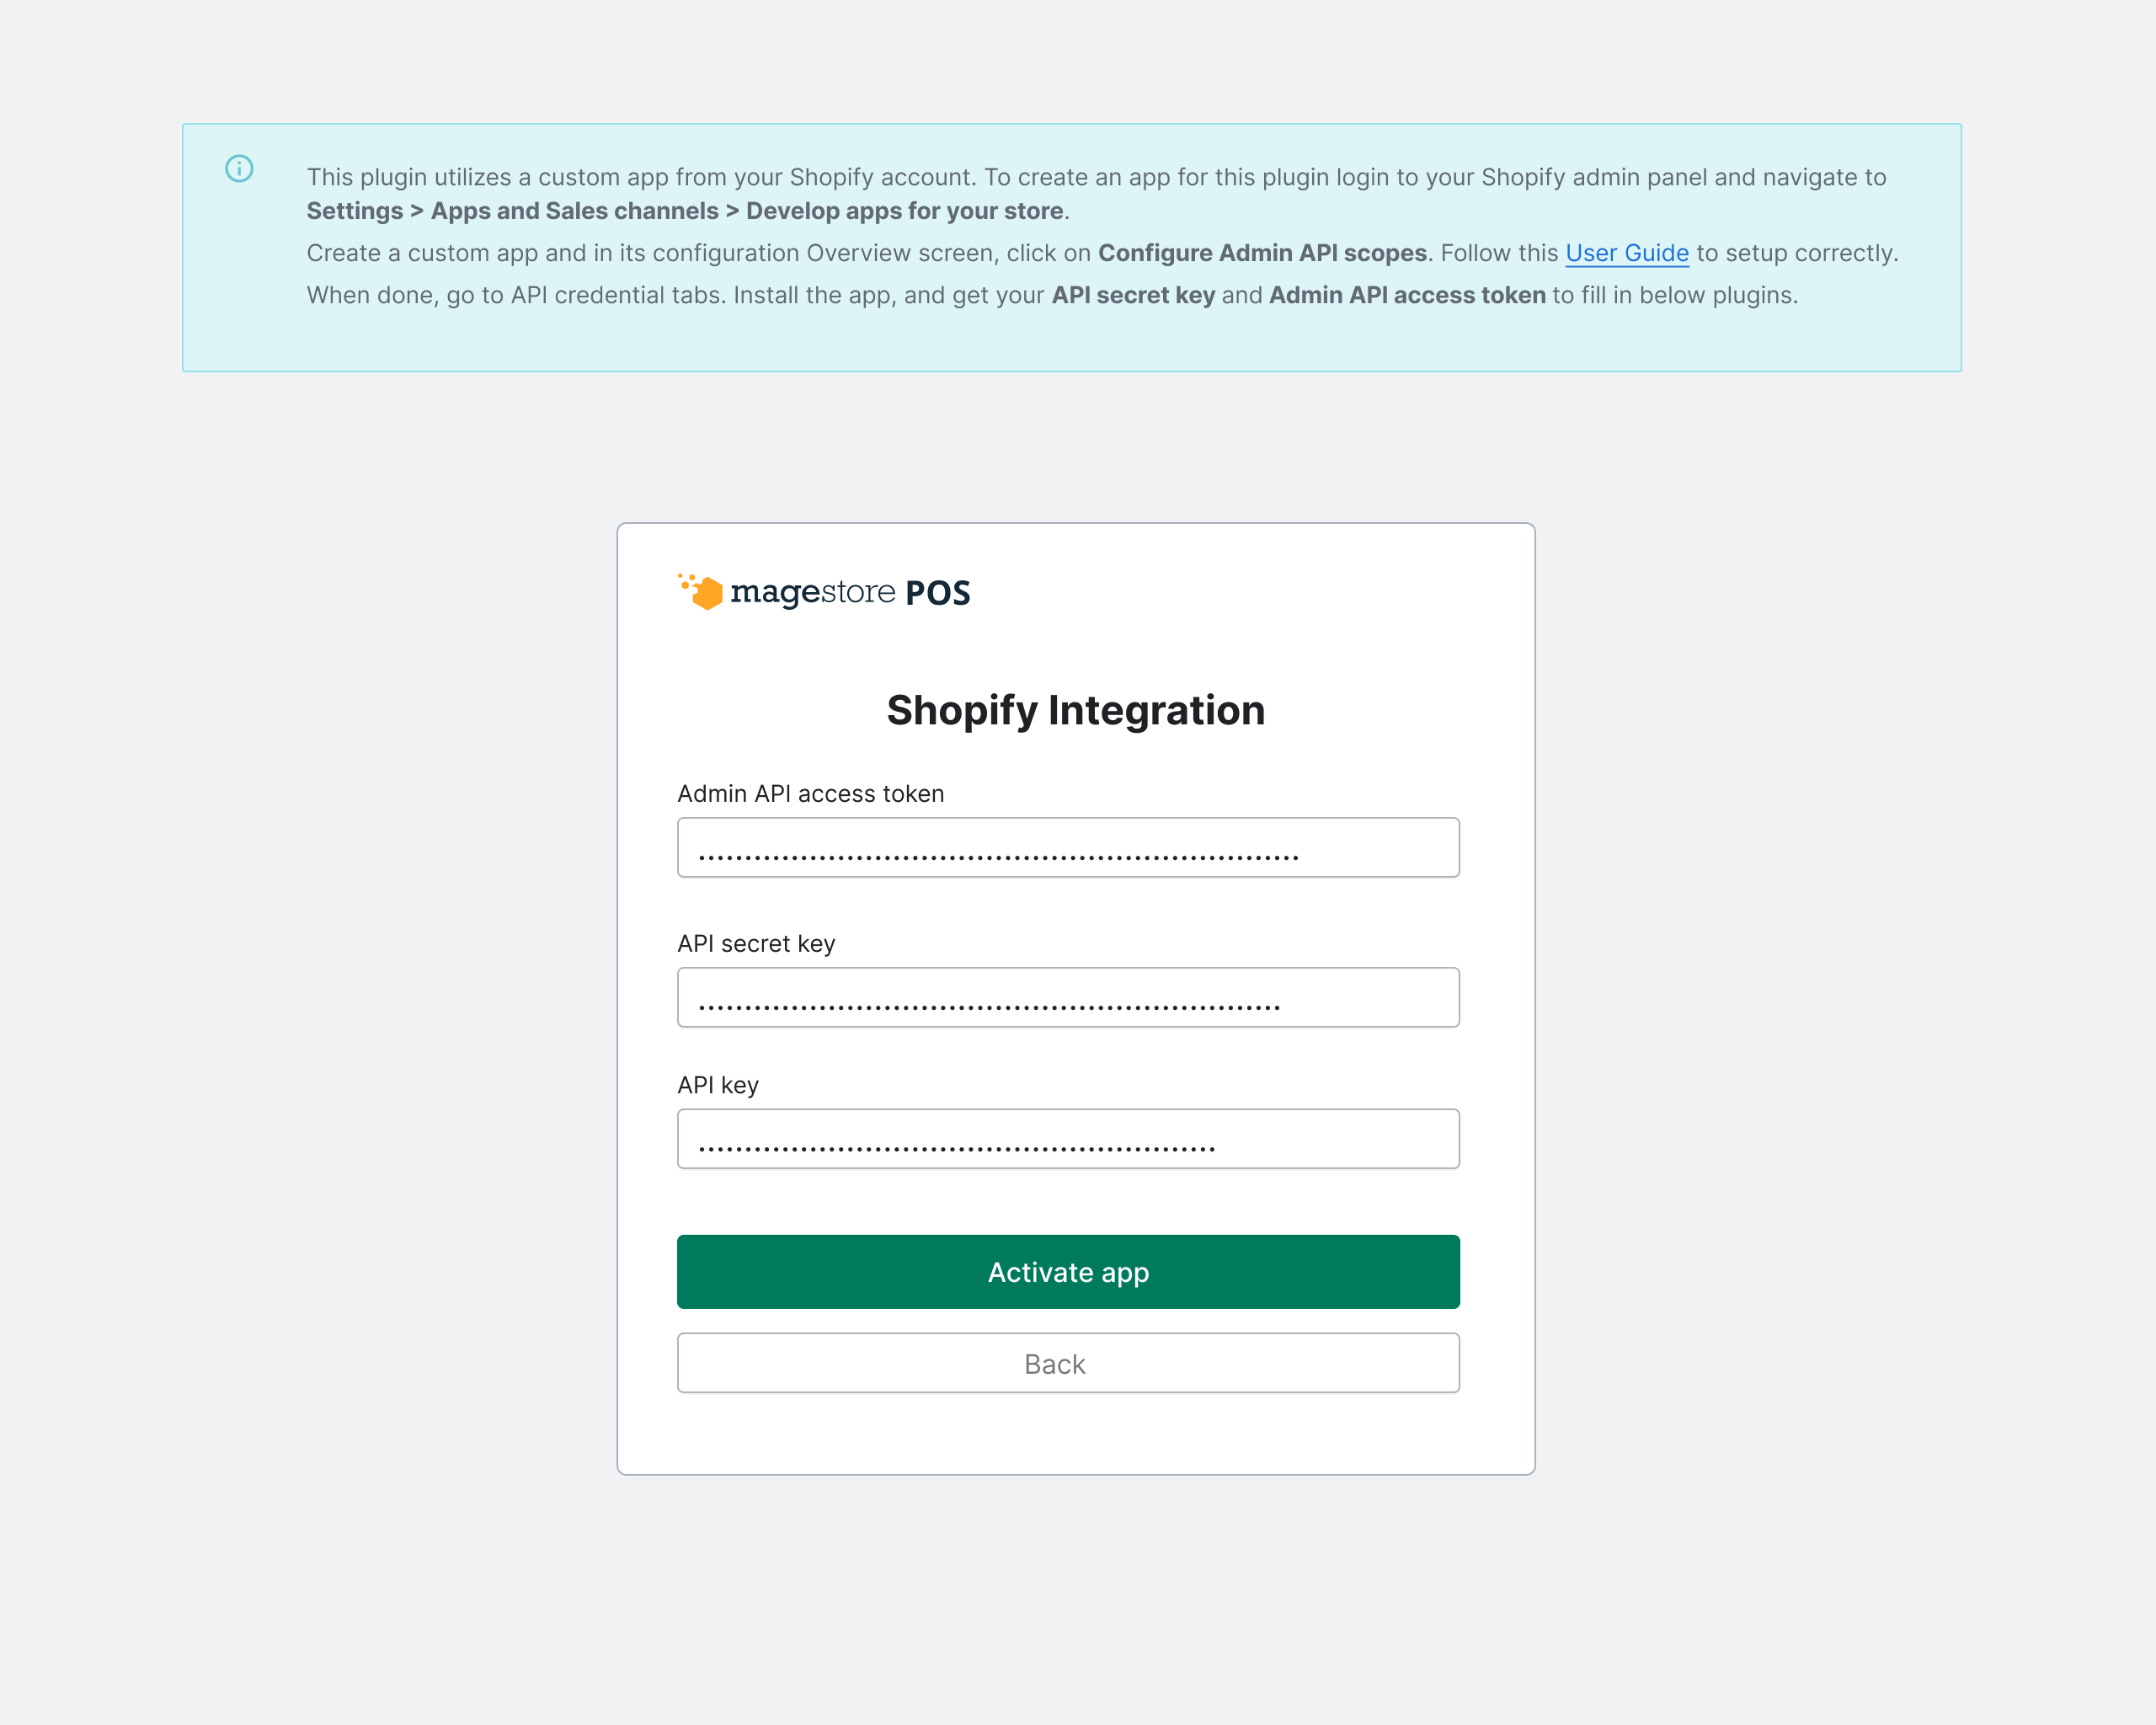
Then, click the Activate app button to start using the Magestore POS app.
Choose between the available pricing plans, Lite and Standard, based on your preference. Once you’ve made your decision, click on Try for free to activate the app.
Log in to POS
After successfully activating the app, the next step is to set up POS data, including POS locations, roles, staff, etc.
To create a new POS, refer to the instructions provided here. You can also find guidance on creating other POS data in our User guide.
For further usage, access the following URL to log in to POS Admin: Magestore POS Admin.

For placing orders, taking payments, fulfilling orders, or reordering, please navigate to the following URL to open POS Checkout: Magestore POS Checkout.