Magento 2.0 is an effective platform for inventory management that provides you with simplified import processes to save your time and avoid errors and data loss. Magento Import function allows you to import all product data including products, product images, advanced pricing data, customer data, and customer address data. With the Import section, you can add or update the products, replace existing data, and delete entities. In this article, we will show you how to import products in Magento 2 with 4 simple steps.
CSV file is the only file format for product import in Magento 2. To run the processes effectively, you need to take note of the things below.
1. The CSV file structure
At Magento 2, the default size of the import file is 2M maximum. To update the file exactly, you need to know the detailed description of the column in the CSV file structure.
- sku – an ID used as a key product attribute in the Magento 2 core. It is unique for each product. SKU can contain digits and letters without spaces and is separated with underscores (_) and en dashes (-).
- store_view_code – an associated store view code. The column will have no data if an associated store or website has a single sub-item.
- attribute_set_code – defines the product to a specific attribute set or product template. You need to create and arrange an attribute set before importing products.
- update_attribute_set – defines whether the product set is updated for the product during the Magento 2 import/export product.
- product_type – the type of imported products. Use only lowercase letters (simple, configurable, grouped, etc.). You can learn about Magento product types clearly with the tutorials for beginners.
- categories – Magento 2 product categories are different from Magento 1 ones. In this system, comma-separated category IDs are used, and full names of assigned categories, including full path, are required.
- product_websites – an associated product website code. Use lowercase letters only (e.g., “base”).
- name – a product name
- description – a product description with color, shape, size,…
- short_description – a short description of a product. Description and short description can include valid HTML tags.
- weight – weight of a product. Always use the following format 1.00000.
- product_online – enables or disables products. Use 1 or 0, respectively.
- tax_class_name – a product tax class. Allows using capital letters and spaces, like in Magento 2 backend, e.g., “Taxable Goods”
- visibility – visibility of a product, e.g., “Catalog, Search”, “Not Visible Individually” etc.
- price – a price of a product, e.g.,. 36.000.
- special_price – a special product price
- special_price_from_date – the beginning date when the special price is applied, e.g., ‘2022-01-02 11:22:30’.
- special_price_to_date – the last date when the special price is applied, e.g., ‘2022-05-02 11:22:30’.
- url_key – an URL key of the product. If there is an empty field, a value is set up automatically based on a product name.
- meta_title – a meta title of a product
- meta_keywords – product meta keywords
- meta_description – a product meta description
- base_image – the image of the key product. It should be uploaded to /pub/media/import. For instance, the path of /sample_data/a/b/ab02-gray-0.jpg has the following structure: /pub/media/import/sample_data/a/b/ab02-gray-0.jpg. Moreover, you can use a direct URL of an image, such as http://site.com/images/some_image.jpg.
- base_image_label – a label of a base product image
- small_image – a name and a path related to a small product image. It should also be uploaded to /pub/media/import.
- small_image_label – a label of a small product image
- thumbnail_image – a name and a path associated with a thumbnail product image. The image should be uploaded to /pub/media/import as well.
- qty – denotes the quantity of product that is in stock.
The default size of a CSV file is 2M maximum.
2. How to import products in Magento 2
2.1. Step 1: Prepare data
To import products, make sure your data is ready by following steps:
- On the Admin toolbar, select System > Data Transfer > Import
- In the Import Settings window, set Entity Type to “Products”

In the Import Settings window, select Entity Type to “Products”
3. Once you’ve selected the Entity Type of Products, click Download Sample File.
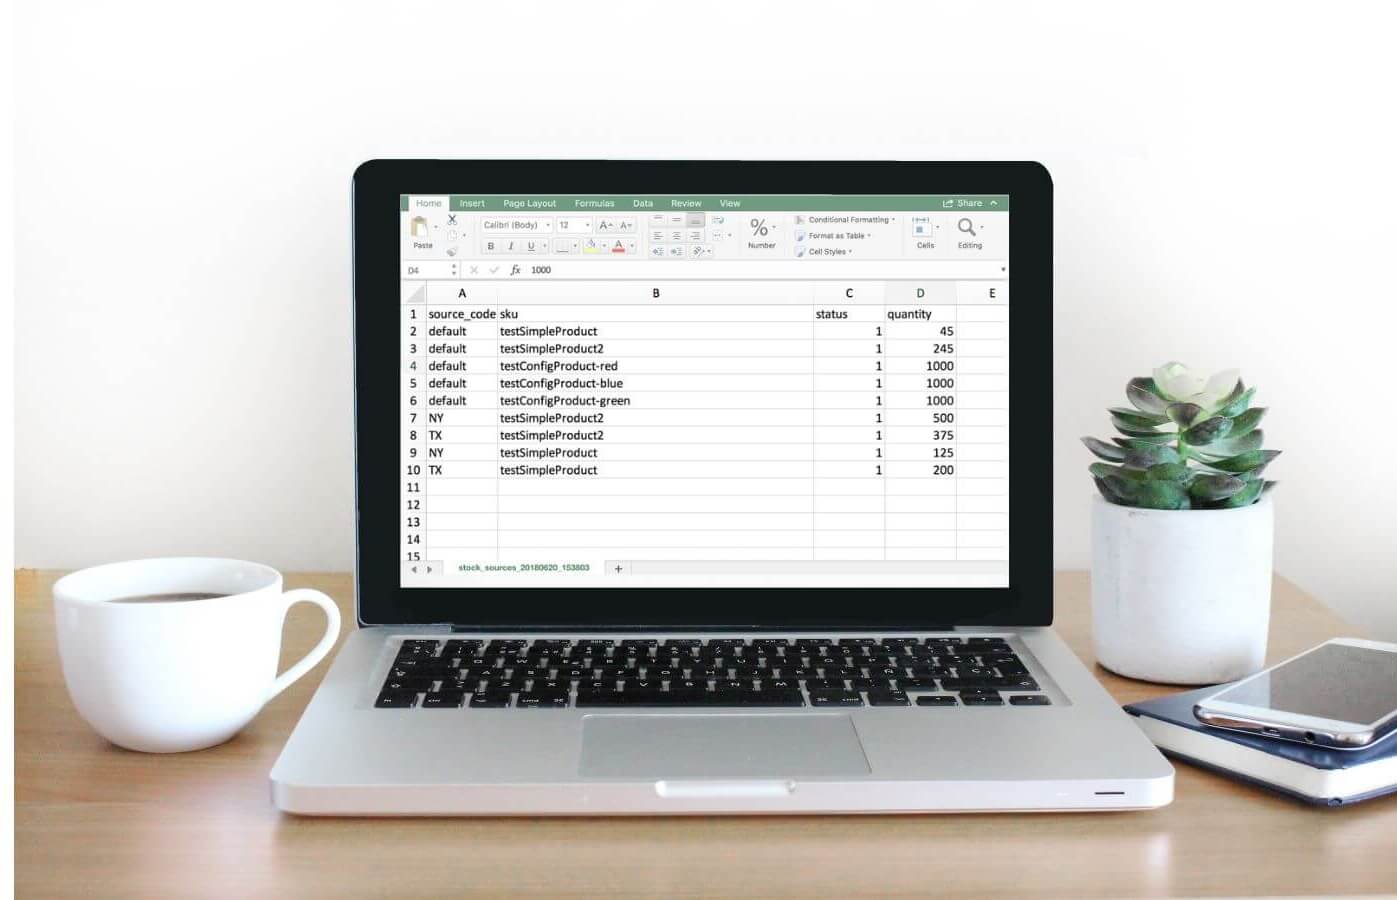
4. Open the sample file on your PC. The file has the layout as below.

The layout of the import file
5. Review the structure carefully and follow it to complete your own product file correctly. You can check the structure explanation in Part 1. Remember that the size of your import file is not over 2M.
6. If the import data includes paths to product images, you need to upload the image to the appropriate location. The default location on the Magento server is pub/media/import. If the images reside on an external server, you have to use the full URL to the directory that contains the images.
2.2. Step 2: Configure Import Behavior
- In the Import Behavior window, select one of the actions:
-
- Add/Update,
- Replace Existing Complex Data,
- Delete Entities.
- To determine the encountered error while importing data, select Stop on Error or Skip Error Entries.
- In the Allowed Errors Count field, type a number of errors to pause the import process. The default number is 10.
- In the Field separator and Multiple value separator fields, use the default as “,” because the default separator in CSV file is a comma. If you want to use another character, make certain that the data in the CSV file matches the character that you specify.
- If you want to enclose any special characters that might be found as an escape sequence, give a tick at the Fields Enclosure checkbox.
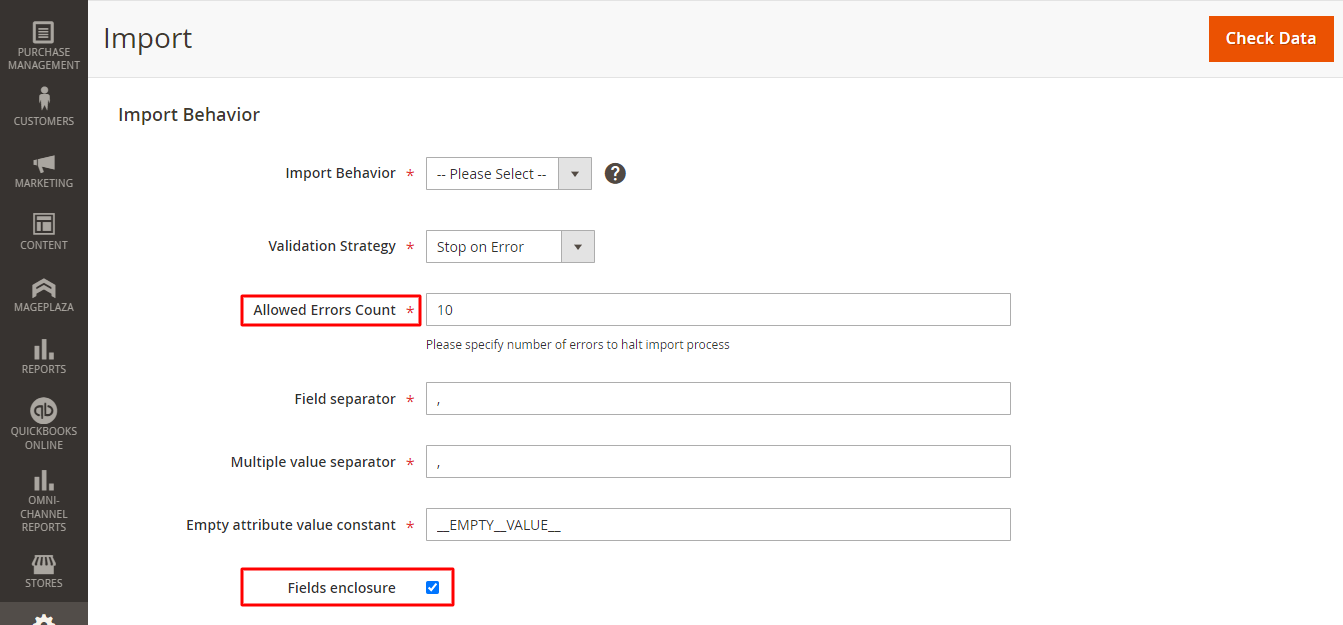
Give a tick at the Fields Enclosure checkbox
2.3. Step 3: Import product CSV file
Let’s follow these steps:
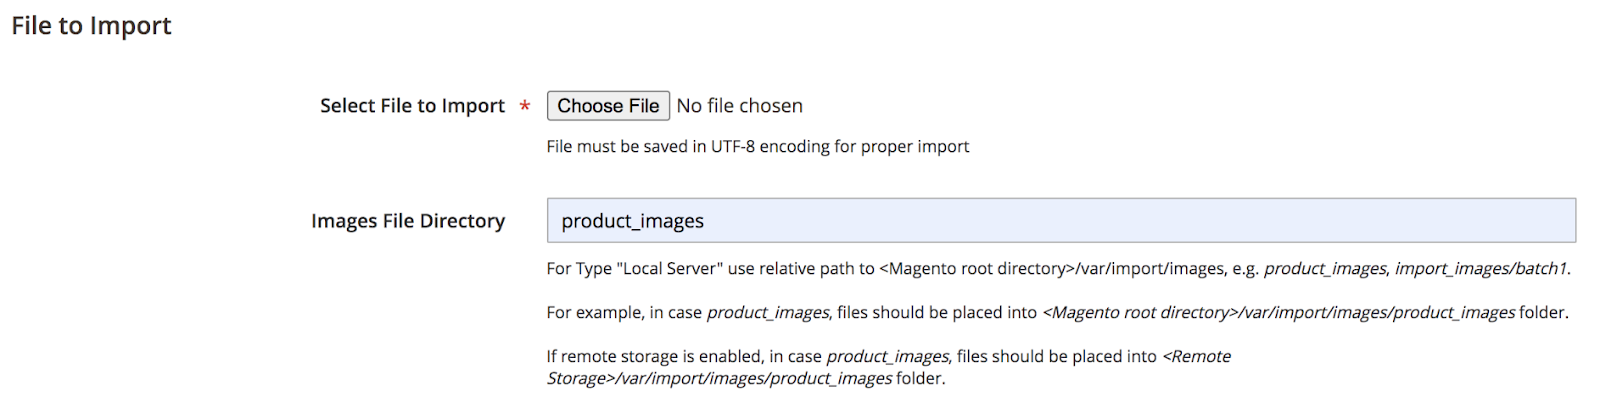
- In the File to Import window, click Choose File button and select your CSV file on PC > click Open,
- In the Images File Directory field, access the relative path to the location on the Commerce server or Magento server which contains uploaded images with 2 options:
-
- For Type “Local Server”, you use a relative path to <Magento root directory>/var/import/images, e.g. product_images, import_images/batch1. For instance, in case product_images, files should be located in <Magento root directory>/var/import/images/product_images folder.
- If remote storage is on, in case product_images, files should be located in <Remote Storage>/var/import/images/product_images folder.
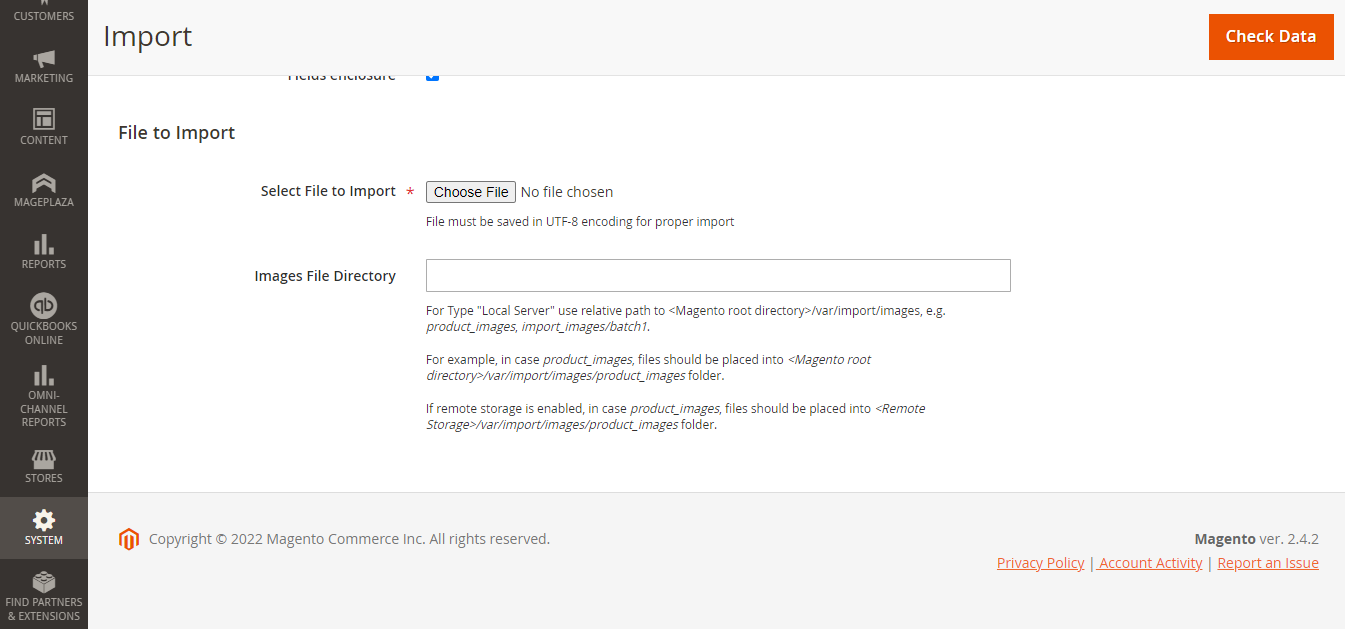
Import file identification in Magento 2
2.4. Step 4: Complete importing data
To finish the Magento Import Products process, a double check is necessary.
- In the top right corner, click the button Check data,
- Wait a few moments till the validation process is complete.
-
- If the import data is valid, you will receive a confirmation message, then click Import.
- If the import file is invalid, the list of problems will be informed in the message. You have to correct all errors to change the import status to valid. You can consult Magento popular issues article to find the best solution.
- When the import is successful, you will receive a message informing your completion. And your import process finishes.
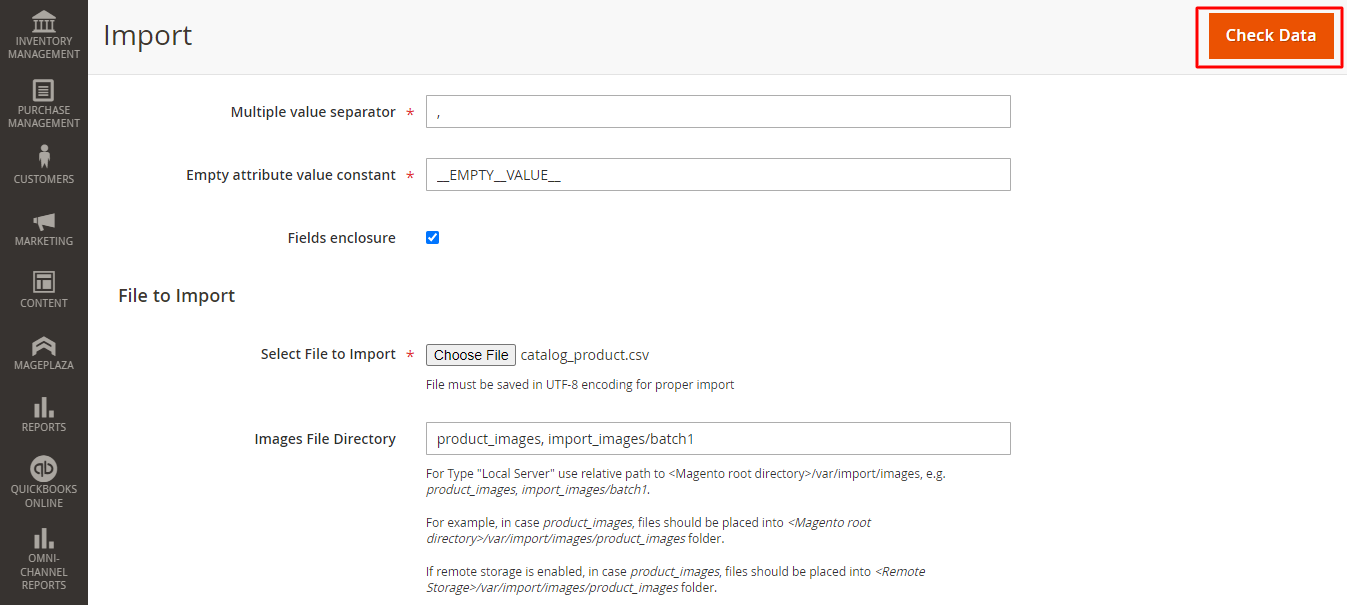
Click Check Data button to complete process
3. How to view the Import History
Now it’s time to see your import history. Let’s follow this path to open the data.
On the Admin toolbar, choose System > Data Transfer > Import History.
The import history detail table will show you all the actions of your import or export.

4. How to import product images
To upload images, you need login credentials and correct permissions to access the right folder:
- For Adobe Commerce users: you need access to the Commerce folder on the server.
- For Magento Open Source users: you need access to the Magento folder on the server.
With the right credentials, you can use any SFTP utility to upload the files from your PC to the server.
The path and file name of each product image is entered in the CSV file, and the image files are uploaded to the corresponding path on the Magento server, Commerce server, or external server. Refer to one of the following ways to import your product images.
4.1. Import images from the local server
1. Whether you’re using Magento or Commerce server, you can upload the image files to the folder var/import/images. However, on Commerce server, you can insert images in a subfolder like var/import/images/product_images. This is the default root folder for importing product images <Magento root folder>/var/import/images.
When Adobe Commerce and Magento Open Source 2.3.2 were released, the path specified in the Images File Directory connects import with the images base directory is <Magento-root-folder>/var/import/images. For earlier Adobe Commerce and Magento Open Source versions, you can choose a different folder on the Commerce server. Make sure that the path to the folder is specified during the import process.
2. In the CSV data, create the name of each image file to be imported on the correct row, by sku, and in the correct column according to image type (base_image, small_image, thumbnail_image, or additional_images).
To import several images for a single sku, you can insert the images in a column named additional_images (add the column if not existing), separated by commas. Example: image02.jpg,image03.jpg.
3. After selecting the importing file, you can enter the relative path following the Images File Directory: var/import/images. For Adobe Commerce and Magento Open Source 2.3.2, this is the default setting to import images base directory.
4.2. Import images from external server
This is another method that applies to both Adobe Commerce users and Magento Open Source users. Here’re the steps you can take:
- Upload the images used for importing to the designated folder on the external server.
- In the CSV data, type the full URL for each image file in the correct column by image type (base_image, small_image, thumbnail_image, or additional_images). Example: http://example.com/images/image.jpg
- Follow Step 2 – Configure Import Behavior to complete the process.

4.3. Import images with remote storage
This method works only for Adobe Commerce users.
In the Remote storage module, you upload the image files to the var/import/images folder or a subfolder, such as var/import/images/product_images. This is the default root folder for importing product images.
In the CSV data, set the name of each image file to be imported on the correct row, by sku, and in the correct column according to image type (base_image, small_image, thumbnail_image, or additional_images).
For further information about enabling and managing the Remote storage module, you can refer to Configure remote storage guide.
5. In conclusion
The process of importing data to Magento 2.0 using CSV files helps you save a lot of time compared with manual configuration. You can take full advantage of that time to improve other inventory management functions, develop sales plans, or enhance customer relationships.
For more related articles about inventory management, please refer to the Report success: Magento 2 inventory report.